

|
|
| This is the User Guide from the new PhotoCard 7.0. The screenshots are from PhotoCard running on an iPhone 4. The features are the same on an iPad or iPhone 5, but the screens differ slightly.[1] |
|
Introduction:
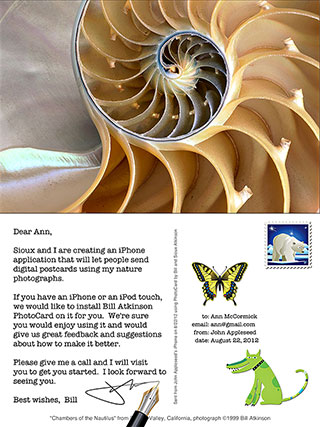
Using PhotoCard on an iPad, iPhone or iPod touch, you can create printed or email postcards to
send to your family and friends. Each card can have one of your photos or a Bill Atkinson
original nature photo on the front, and your message and other decorations on the back.
You may send an unlimited number of PhotoCards, and you can send them to anyone who can receive
email or postal mail.
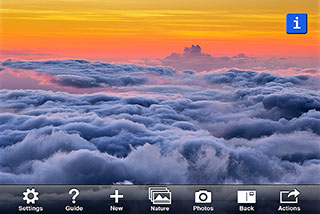
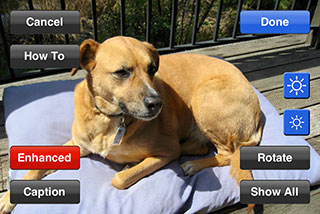
When you first launch PhotoCard, you will see a default photo for the card front and a toolbar across the bottom of the screen. (On the iPhone, to hide the toolbar to view all of the photo, tap on the photo. Tap again to show the toolbar.) |
|
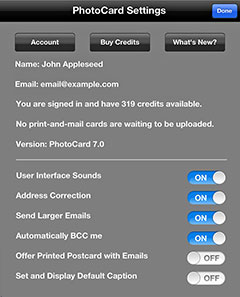
Getting started: To begin, you will enter your name, email, and password for your PhotoCard account, which lets you share your credits (needed to send print-and-mail cards), custom stamps and stickers, and sent card history, with all your other iOS devices. Once you sign into your account, PhotoCard will keep you signed in until you choose to sign out. Settings: To customize the app, tap on the Although you only need one account, there can be more than one account on an iOS device. This is handy if you share your iPhone or iPad with others but want to keep your PhotoCard data private. You can sign out on the "Account" screen, and let someone else sign into his or her account. User guide: You can tap the |
|
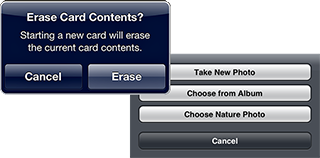
Starting a new card:
To start a fresh card, tap the |
|
Flipping between the card front and back: Once you've chosen a photo, tap the The card back toolbar has buttons that allow you to choose a font, to choose any number of stickers and/or voice notes, and to perform actions such as sending the card. |
|
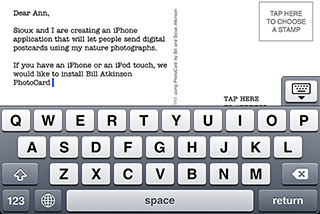
Entering a message: Tap in the message area on the left side of the card and the keyboard will appear so you can type a message. When you're done typing, tap the hide keyboard button to dismiss it. To make corrections or copy and paste, press and hold to bring up the text magnifier.
|
|
|
Choosing stickers:
You can tap the Positioning stickers: There are various things you can do with stickers — Drag stickers to position them, or drag them off the card to delete them. (PhotoCard will reposition any sticker that would overlap the address or stamp.) You can tap on stickers to bring up handles for resizing or rotating, or double-tap on stickers to duplicate them. You can drag a sticker left and right several times to flip it horizontally. |

|
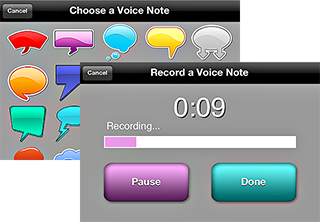
Adding voice notes: Add sound with the |
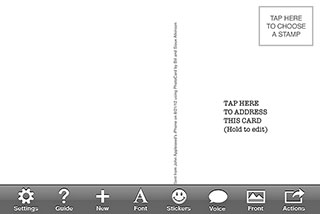
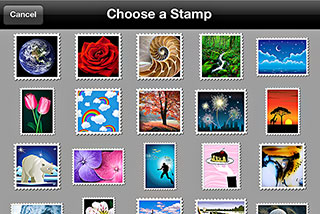
Choosing a stamp:
Tapping in the upper right corner of the card will bring up the stamp library.
Tap a stamp in the library to choose it for your card. (In case you forget,
PhotoCard will prompt you to choose a stamp before you send the card.)
|
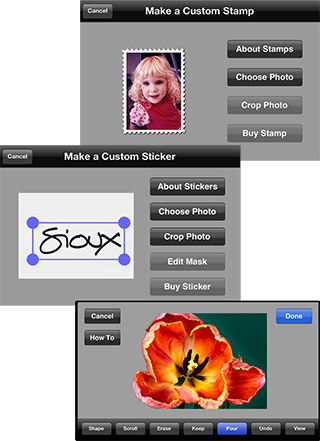
Making a custom stamp: At the bottom of the stamp chooser, you will find an option to "Make a Custom Stamp." Tapping this will bring up the stamp maker where you can choose an image from your device's "Photos", crop it to show the portion you want, and make it into a personalized postage stamp. Making a custom sticker or signature: At the bottom of the sticker chooser, is "Make a Custom Sticker." Tapping this brings up the sticker maker where you can choose your photo and crop it. Unlike stamps, stickers don't have to be rectangular. If you want, for example, an oval-shaped or irregular-shaped sticker, or a signature with transparent portions, "Edit Mask" will take you to a view that offers tools to make a rectangular image into a non-rectangular sticker. If you tap "How To" in the mask editor, you can read detailed instructions for these tools. |
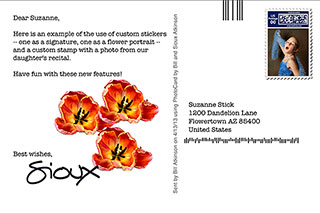
Making custom items:
PhotoCard now offers ways for you to design and use your own stamps and stickers.
Your favorite picture of your child, for example, can be made into a postage stamp that
you can use on your cards. And custom stickers are ideal for creating a "signature"
or a personal decoration. Once you have paid a small fee for processing
and registering your custom stamp or sticker, you can use it as often as you like without
further cost.
|

|
Addressing a card:
To address a card, tap on its right side to display the "Enter Card Address" screen. Then tap
the Contacts button on the right and search for, or scroll to, an existing contact.
Once you are viewing that contact's information, tap one of the email or postal addresses to choose it.
To send to someone not already in your Contacts, tap the "+" button to add a new contact. Or to send to someone
you've sent to before, tap "Recent". If you like, you can enter the name and address into the fields
by typing.
A shortcut: For U.S. postal addresses, you can simply enter, into the "Postal" field, the house number and street name on the first line, then just the zipcode on the second line. PhotoCard will fill in the city and state. |
|
Sending cards:
Once your card is addressed, tap 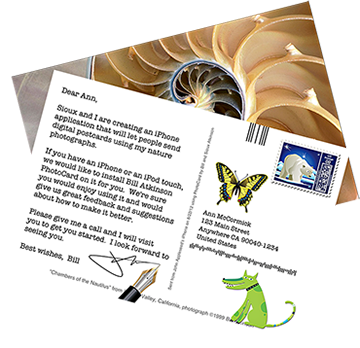
If you have chosen a postal address rather than an email address for your recipient, your custom 8.25 by 5.5 inch PhotoCard will be professionally printed on heavy card stock using an HP Indigo digital press. Then it will be coated on both sides and sent by US First Class mail. |


|
To post a card to an email address, tap the To post a card to a postal address, choose "Send Postcard by Mail". If you post cards when you are not connected to the internet, they will be saved and uploaded when you next run PhotoCard while connected. Important: for print-and-mail cards to upload, you must be running PhotoCard. This differs from email. |
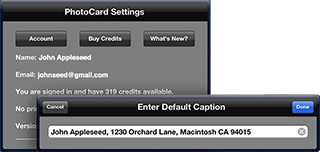
| Using default caption for return address: At the bottom of the PhotoCard "Settings" view, you will find a switch to "Set and Display Default Caption". If enabled, this will show the line of text you enter, across the bottom of the card back. This can be used to display your return address or other information. (Note that it will only show when you are using one of your own photos, not a built-in one.) |
|

|
Gifting a printed postcard:
Because you may not know the postal address of someone you would like to send a print-and-mail postcard to,
PhotoCard gives you the option of having the recipient provide his or her address. If you turn on the PhotoCard setting
labeled "Offer Printed Postcard with Emails", your emailed cards will be sent with this text at the top:
"(sender name) has offered you a gift. To receive a free printed version of this postcard, tap here.
This offer expires in two weeks."
If your recipient taps on the link, a web form like the one shown below (with your name as sender name) will accept his or her name and address. And your account will be charged the appropriate number of credits for a printed card sent to a domestic or international address. |
|
Sharing a card to social media:
The |
|
|
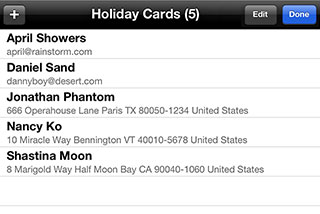
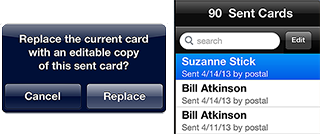
Viewing previously sent cards:
Tap |
|

|
Editing sent card history: Tap "Edit" (adjacent to the search box) to alter the sent card history. You will then be able to select one or more cards by tapping on them. At the bottom of the screen, buttons will appear so that you can "Delete" or "Sync" the selected cards. (Sync lets you view older sent cards on your other iOS devices. Note that cards sent with PhotoCard 7.0 automatically sync.) |
|
More information: We hope you enjoy using PhotoCard by Bill Atkinson. If you find a bug or awkwardness, wish to suggest a feature or give feedback about features you liked and disliked, please send an email or a PhotoCard to billatkinson123@gmail.com [1] iPhone, iPad and iPod touch are trademarks of Apple Inc., registered in the USA and other countries. [2] Please note that Bill Atkinson nature photographs are all copyrighted works of art. Included in your purchase of the PhotoCard application is a limited license to print and send any of the included photographs in PhotoCards for non-commercial purposes. |